




Guides
Beginner walkthroughs and live event ops
LIVE 4.10.1Event roster - what exists right now
Snapshot 19 Sep 2026. Persistent Universe is Alpha 4.10.1 “Orison Relief.” Siege of Orison V2 is the current headline instance. Relief contracts run until 4.10.2 (community target around 7 Oct). Pirate Week 2026 wraps 28 Sep. Xenothreat 4.8.3 is finished. Mechanics drift - confirm in mobiGlas before you spend an evening on a number from this page.
| Name | Type | Where | Status |
|---|---|---|---|
| Siege of Orison V2 | Instanced FPS raid (up to 4) | Orison, Crusader | LIVE - 4.10 |
| Orison Relief Support | Timed contract track | Crusader / microTech | LIVE until 4.10.2 |
| Pirate Week 2026 | Treasure hunt + flair | Verse-wide / Delamar | Ends 28 Sep 2026 |
| Rock Breaker / QV Cracker | Sandbox dungeon + mining | Nyx, Keeger Belt | Persistent |
| Storm Breaker (Apex Valakkar) | Sandbox raid | Pyro IV to Pyro I | Persistent |
| ASD Onyx Facilities | FPS investigation / loot | Stanton moons | Persistent |
| ASD Farro / Lazarus | Storm Breaker chain | Pyro | Persistent |
| Hathor Align and Mine | Open-world laser + cave mine | Daymar / Aberdeen | Persistent |
| Contested Zones + Exec Hangars | PvPvE boards / ships | Pyro stations | Persistent |
| Wikelo Emporium | Collection / craft exchange | Stanton emporiums | Persistent |
| Recco Battaglia | Nyx story + prestige miners | Levski | LIVE - 4.10 in-person |
| Ice Valakkar cull | Side merc contract | QV Breakers | Persistent |
| Return of Xenothreat | Combat point track | Stanton / Jericho | Ended 15 Jul 2026 |
| Jumptown dynamic event | Drug-lab war | Daymar / Yela labs | Event retired; labs still exist |
| Foundation Festival / Free Fly | Marketing / referral | Launcher | Aug 2026 window closed |
| Ship Showdown 2956 | Community vote | RSI site | Annual / out of game |
Not official CIG content. Facts are drawn from the Alpha 4.10 and 4.10.1 patch notes and wiki, community Rock Breaker and Storm Breaker briefs, Siege V2 and Orison Relief one-pagers, the Onyx FAQ, the Contested Zones and Hathor wiki pages, Recco 4.10 guides, Pirate Week 2026 solvers and the Xenothreat 4.8.3 notes.
Click a Guide - Read it below
Orison Relief Support
This is not the raid. After the Nine Tails hit, Crusader is paying anyone to rebuild. Contracts come from Cornerstone (rebuild / TH-01 Propulsor crafts), Covalex + Ling (meds and iodine out of New Babbage / Port Tressler), and Foxwell (outpost FPS and ship waves). Every completion feeds your SecondWind track. Party members get full milestone points; aUEC splits.
| Tier | Medium hauls | SecondWind unlock |
|---|---|---|
| 1 | 2 | S-38 pistol |
| 2 | 3 | FBL-8a light armor |
| 3 | 6 | P4-AR rifle |
| 4 | 7 | ORC-mkX medium armor |
| 5 | 10 | Lumin V SMG |
| 6 | 12 | ADP-mk4 heavy + FBL-8u undersuit |
Fast loop: accept Medium Supply Haul (96 SCU medical supplies = twelve 8-SCU boxes, 6,000 points, no cooldown, no rep gate). Pickup is usually a microTech / New Babbage stellar route. Rent an ARGO RAFT at Teasa if you do not own 96+ SCU that eats 8-SCU boxes. Dump at Orison, re-accept, twelve times and the hangar skins are yours. Large 960-SCU hauls exist for Hull-C / Ironclad crews; salvage rubble loops still work but take far more turn-ins.
Relief rewards are finished items to your account, not blueprints. Siege loot and Relief loot do not share a bar.
ASD Onyx Facilities
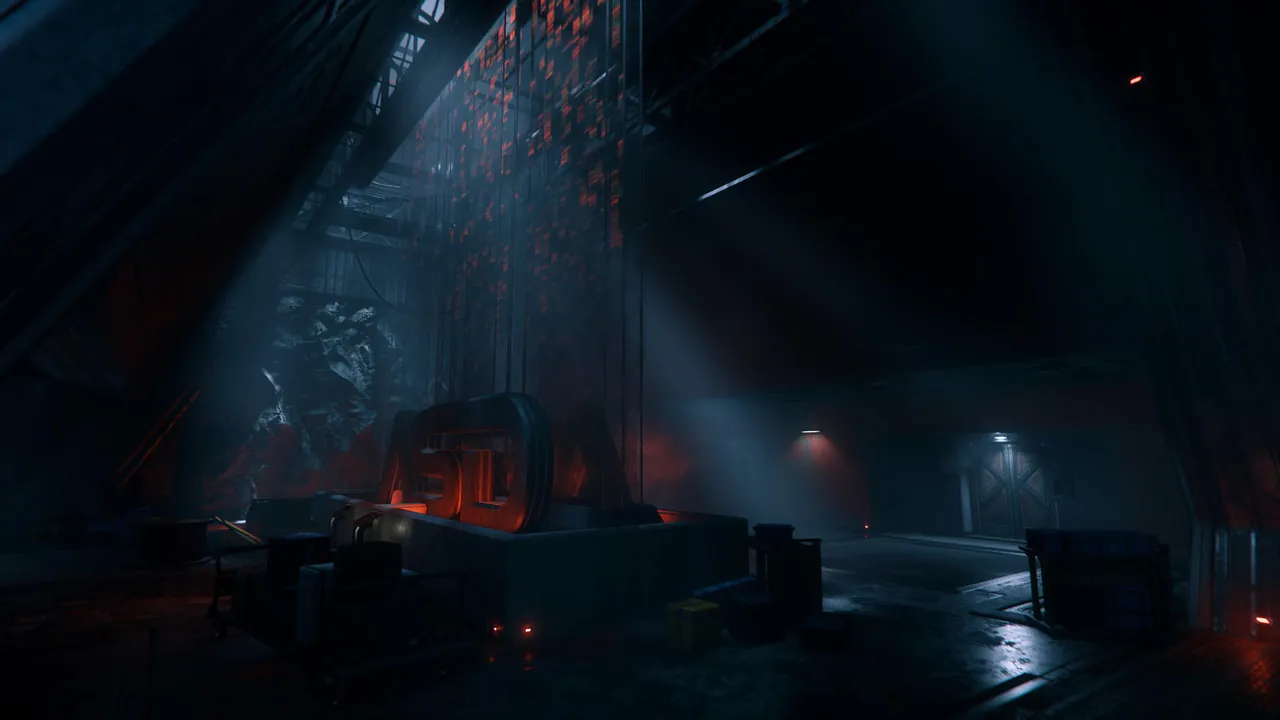
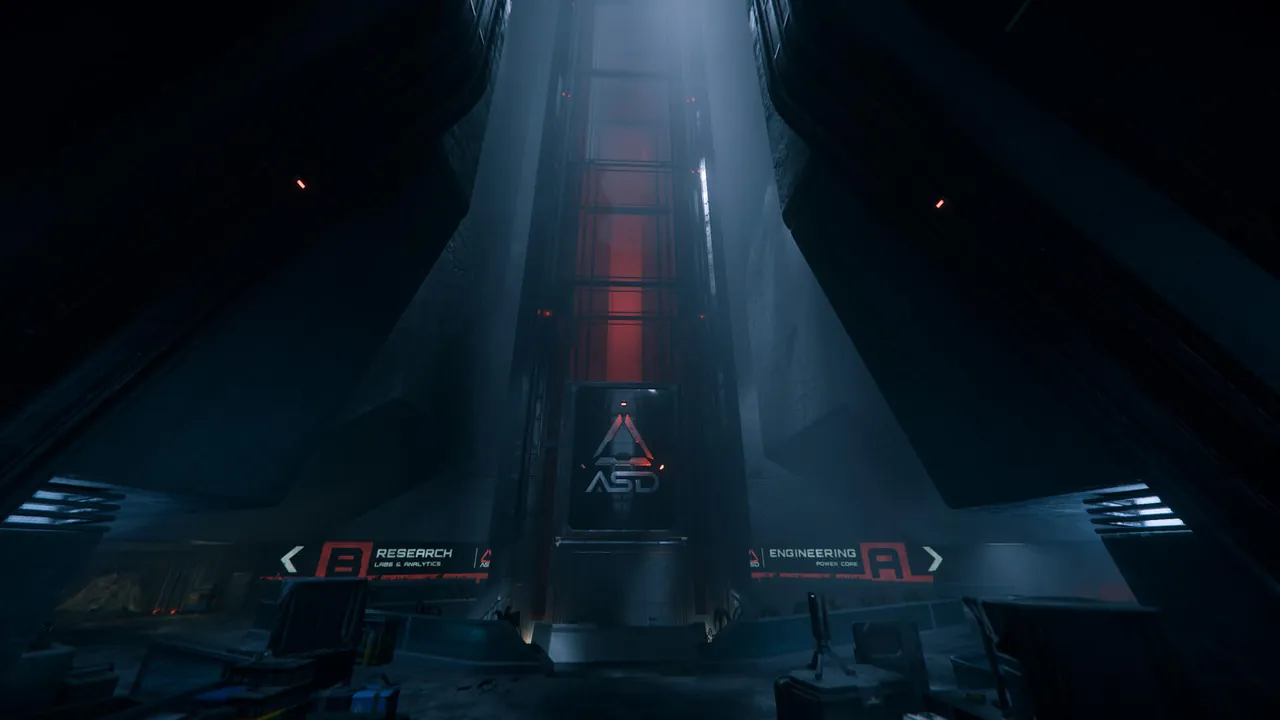
Associated Science and Development black sites under Stanton’s moons (Calliope, Lyria, Cellin and friends). You request a hangar like a station and drop into a buried campus: Engineering (A), Research (B), later Site-B / Dr Jorrit’s lab. This is the FPS dungeon - not the Pyro radiation worm.
How to run it
- mobiGlas → Investigation. Hockrow / Arken Mallor chain. Redwind hauling variants exist if you only want to touch the campus.
- Call the hangar on arrival. Do not belly-land the surface pad and wonder where the dungeon went.
- Phase 1: personnel / engineering / research files. Light NPCs, recorders, a pipes puzzle, zero-g shafts.
- Phase 2: energy anomaly and security data. Harder AI, timed rooms, more environmental spite.
- Site-B: Jorrit’s lab, Hyperion puzzles, Yormandi fauna if that contract is up. Geist stealth armor and Corbel / Fresnel loot live on deep engineering routes.
Turn-in: ASD Secure Drives and Site-B compounds. Wikelo eats the drives. Print cards and fuses before you commit to a two-hour Site-B.
Onyx is Stanton. Storm Breaker Lazarus is Pyro. Geist armor is an Onyx loot problem. Sterling suits are a Pyro radiation problem. Do not pack for the wrong ASD.
Siege of Orison V2
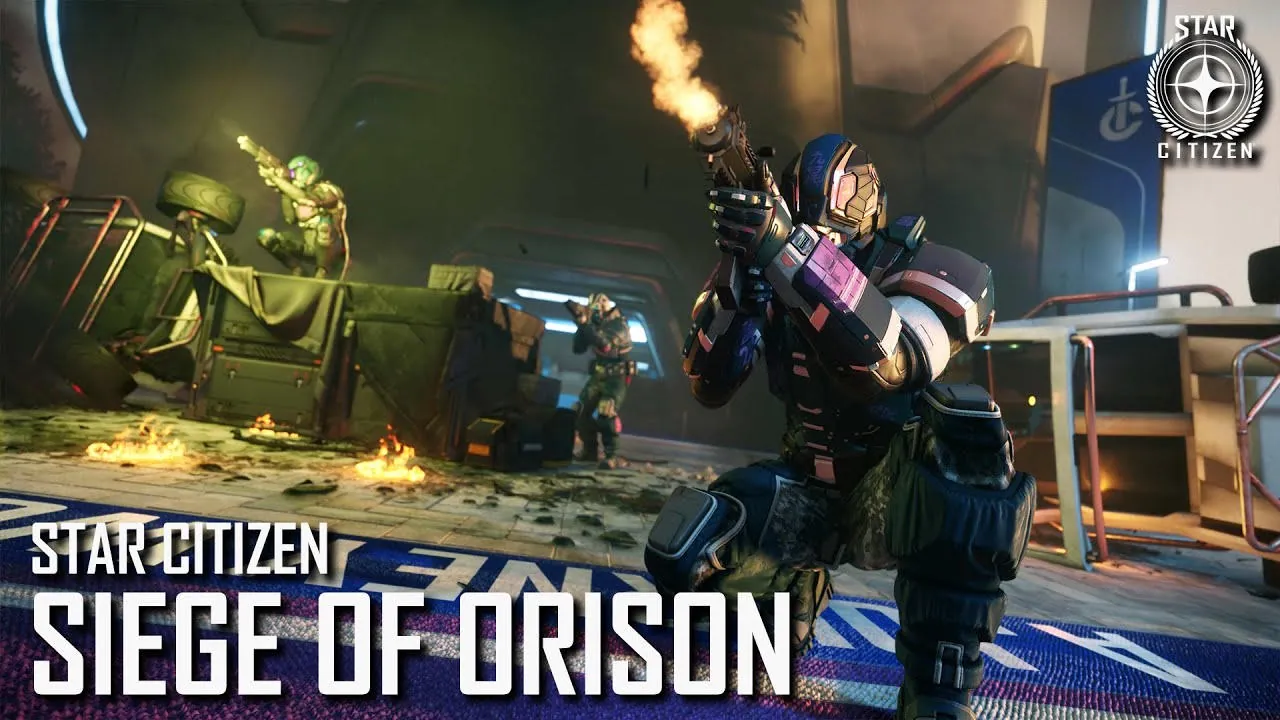
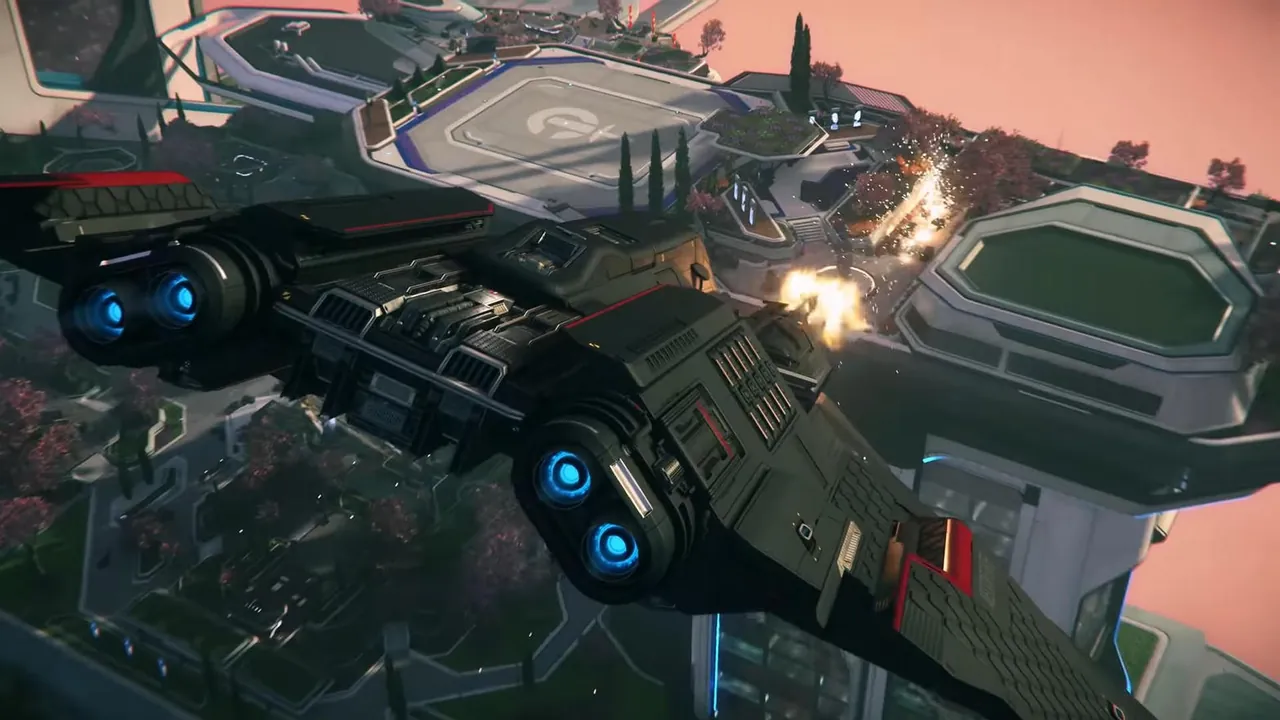
The old open-world platform war is gone. 4.10 rebuilt Siege as a closed FPS dungeon: your party only, shuttle between three Nine Tails-held platforms in the Inspiration Park cluster, kill commander Mendo Ren, kill the IFF inverters so Crusader Security can come home.
How to start
- Land in Orison (Crusader, Stanton).
- Crusader Industries Showroom → rooftop Inspiration Station.
- Optional pointer contract: Mercenary tab, “Orison Platforms Under Attack.” You do not need it.
- Group first. Cross the instancing gate together or you split into different copies.
- Walk to the Solanki shuttle. The contract Retake Platforms From Nine Tails should auto-accept. You do not fly a ship inside the instance.
Platform flow
| Order | Platform | Job |
|---|---|---|
| 1 | Solanki | Mortars first, then infantry, grab lieutenant key if it drops, shut the inverter. Community shorts also call out node resets here. |
| 2 | Hartmoore | Same pattern. ATLS wrecks / pinned CDF flavour. Flank after the inverter dies - AI changes posture. |
| 3 | Admin Center | Cleanest geometry. Push to Mendo Ren. Loot his card. Last inverter ends the instance. |
Bring a backpack, about 6 fuses, a medgun, and ammo for whatever you actually shoot (Bullpup / Arlington / Vendetta if you already own super-heavy). Instance medbeds are supposed to be unlimited and not eat MedGel. If they dump you back to Orison, that is a known flake - restart and regroup at the gate.
Rewards: aUEC, fabricator blueprints, a siege weapon skin, plus the new BUL-H4 super-heavy set and Apocalypse Arms Vendetta HMG also hanging off Wikelo. Vendetta wants the super-heavy plate; teammates can tractor-reload the belt pack.
19 Sep advisory. Increasing reports that Mendo Ren fails to spawn. If the Admin platform is empty, leave, rebuild the instance, or wait for the next hotfix rather than clearing Hartmoore for an hour.
Valakkar - Storm Breaker
Three animals share the name. Only one is the Valakkar event.
| Variant | Where | Loop |
|---|---|---|
| Arid / desert | Leir III, Daymar, Monox | Wildlife, fangs, pearls |
| Ice | QV Breakers, Nyx (4.7+) | Tunnel guards + Highpoint cull |
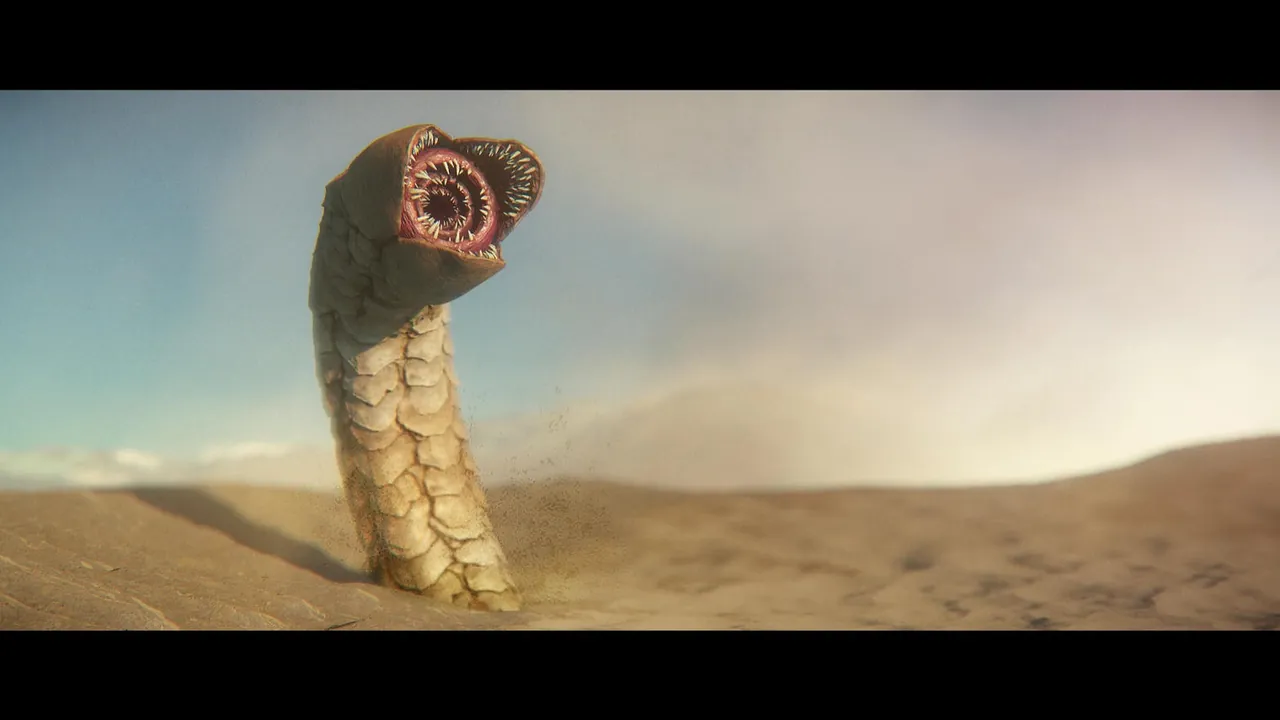
| Irradiated Apex | Pyro I Lazarus storms | Storm Breaker boss |
- Pyro IV Farro / Barrow data centers. Turrets, scientists, data-processing key, print the Lazarus specimen-cache card. Vault guns on the way out.
- Pyro I Lazarus Transport Hub - do not hero-land the storm. Shuttle in. Claim the infirmary medbed. Maintenance key → garage power → ATLS IKTI.
- Sterling suit for the inner labs. Pull the irradiated egg only when the courtyard path is live. Half-life is the number people plan around (about 30 min).
- Calling tower insert. Adds spawn: juveniles, adults, kopion, leftover security.
- Green pustules are the weak points. Bile and slam delete people who stand in the mouth photo. Harvest irradiated pearls and apex fangs; Rayari still posts pearl collections. Tractor to the freight elevator.
Rock Breaker / Rock Cracker
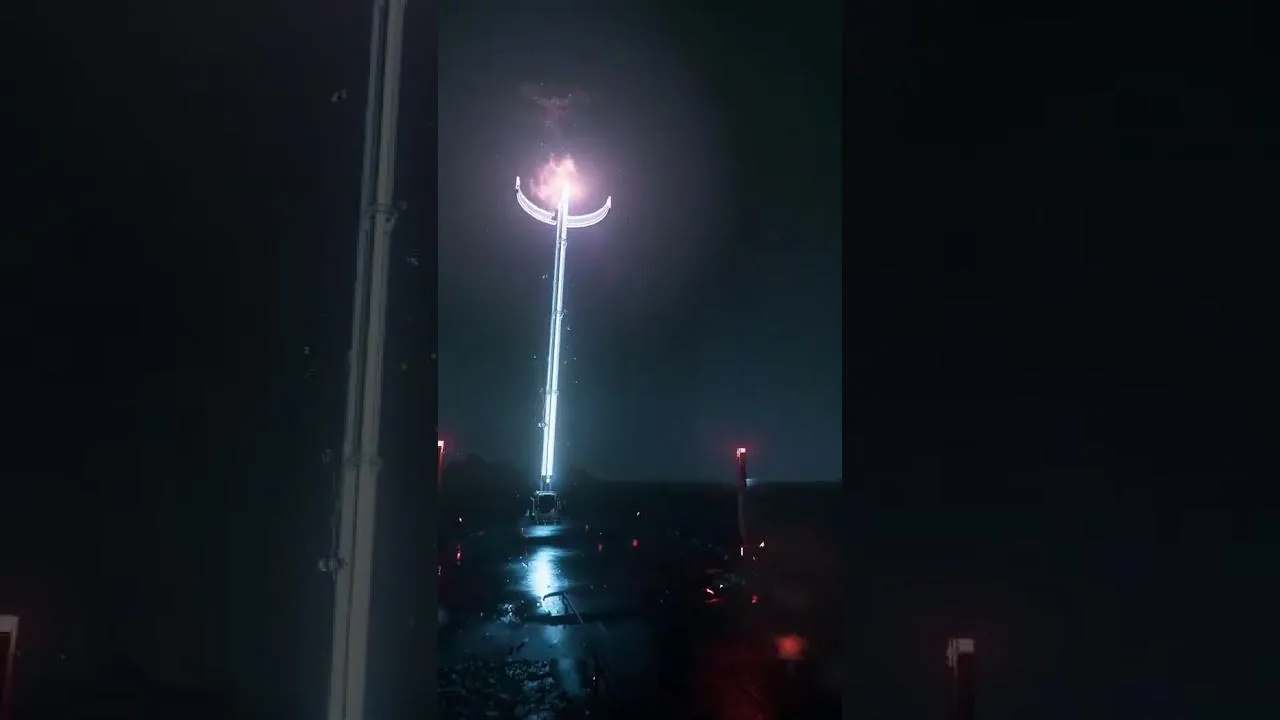
Restore a dead breaker station, fire the asteroid laser at 100% yield, ship-mine Savrilium / Torite. Exclusive about 850k aUEC, Shared about 175k. Jr. Contractor unlocks shared; Contractor unlocks exclusive - grind Shubin purchase orders (hand mine one gem type first, then ship-mined Iron/Quartz/Copper, then the medium Al/Ti order).
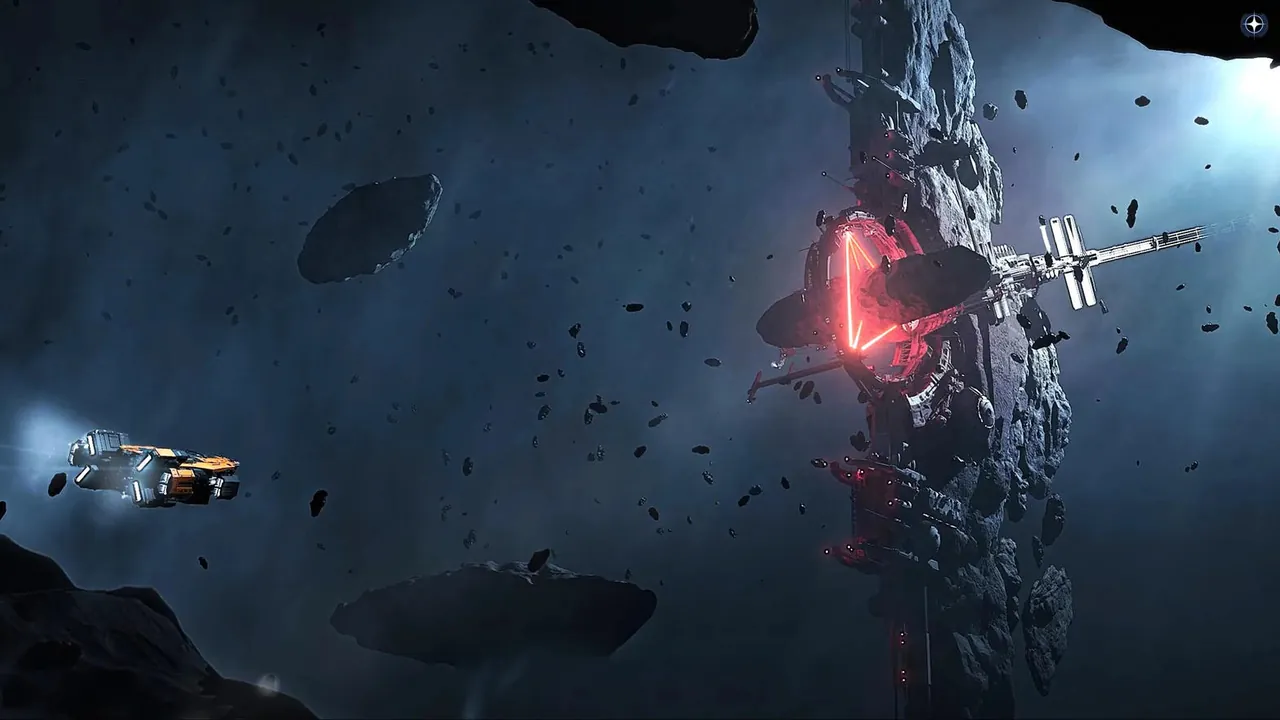
- Side pads, not the locked front door. Clear ice Valakkar before tools.
- Capacitors off yellow four-leg robots → Power Core. Mine 12 Sadaryx.
- Operations reset. Write three refractor codes immediately.
- Storage combat spike. Release and trolley four catalysts.
- Craft three lenses (4 Sadaryx each). Align refractors A/B/C. Green 100% board. Ignite.
- Prospector or MOLE into the fracture. Partial setup wastes the fee.
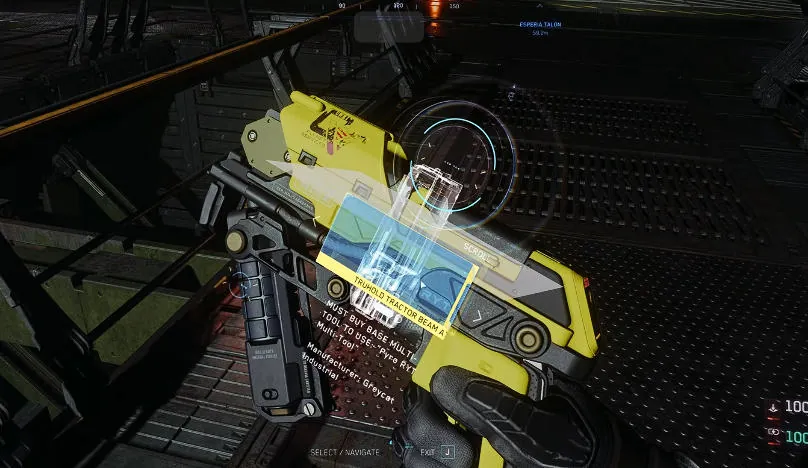
No tractor, no codes, two lenses, or a shared pad with no security - those are the four classic wipes.
Contested Zones and Executive Hangars
Free-fire interiors on three Pyro stations. Unique guns, Grade-A parts, and Comp Boards. Death drops what you are wearing. This is the high-risk loot loop, not a story mission.
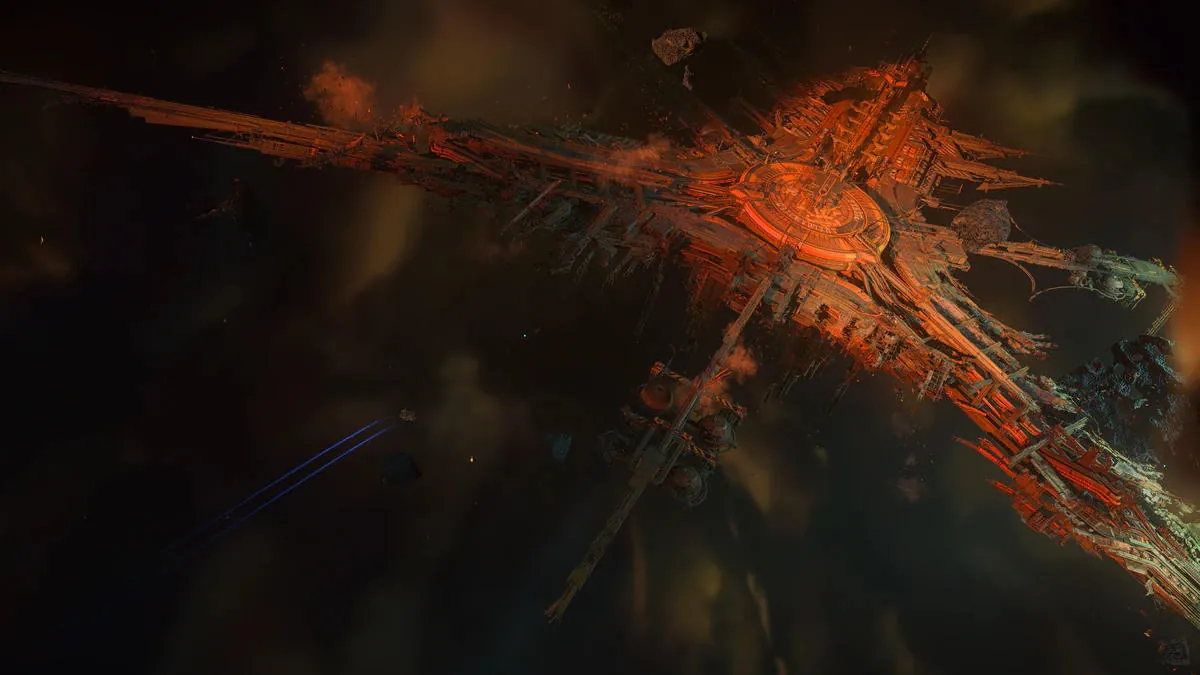
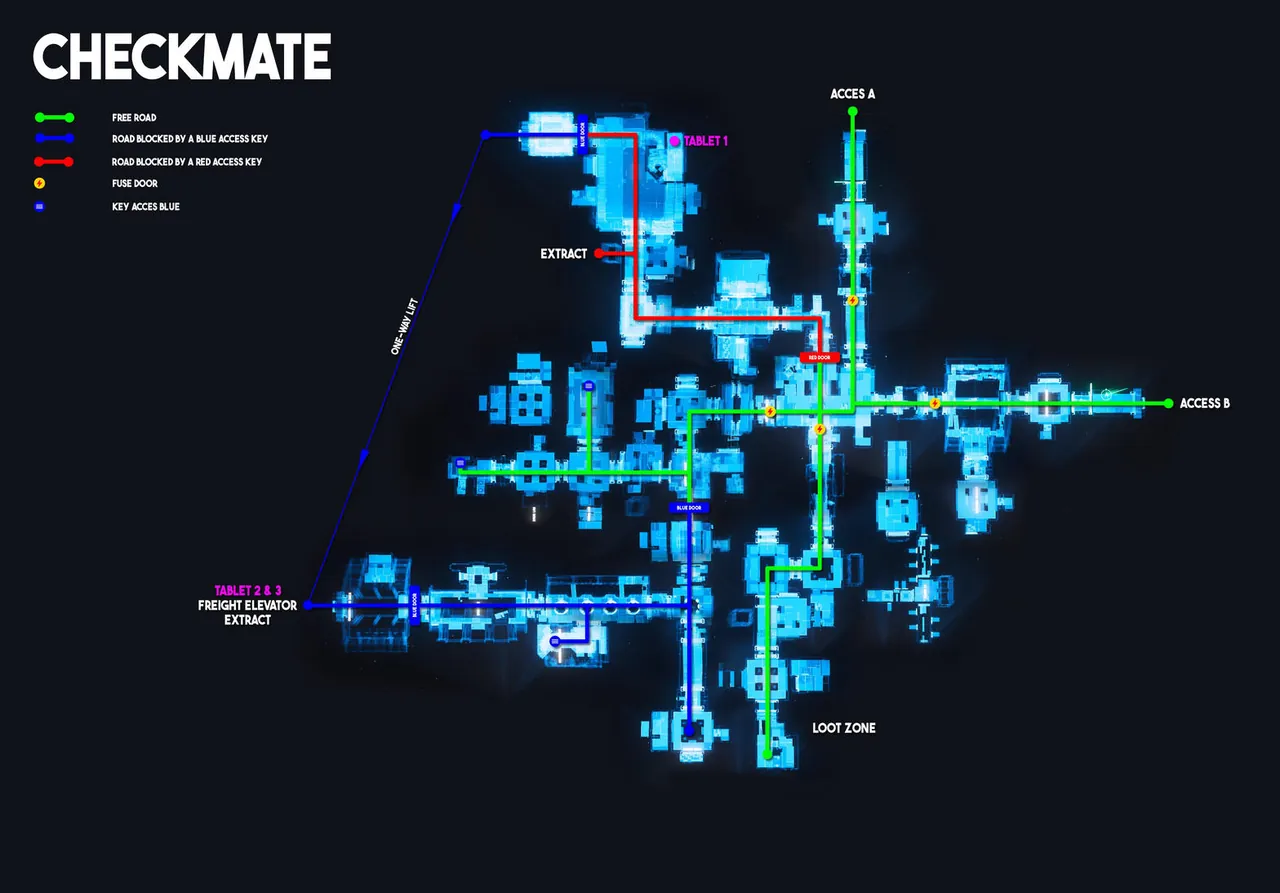
- Bring fuses, a tractor, 15+ mags, pens. Blue security cards print inside each CZ (about 15 min). Red supervisor cards do not - farm PYAM-SUPVISR printers (about 30 min) and carry two if you want Checkmate and Orbituary vaults in one outing.
- Fuse doors, blue doors, red doors. Ruin’s timed vault still works on a cycle (community numbers wander between 20-30 min; watch the lights).
- Boards 1-7. Once you have the set, PYAM-EXHANG: wait for five green hangar lights, slot boards, pull a flavoured ship plus the exotic FPS toys.
Supervisor printers are camped. Treat the approach like a contested bunker, not a shopping trip.
Align and Mine
Four Orbital Laser Platforms, each with three ground PAFs. Align dishes, haul batteries to orbit, fire the laser into the crust, then hand-mine the cave. Sites: Attrius + Lamina (Daymar), Ruptura + Vivere (Aberdeen).
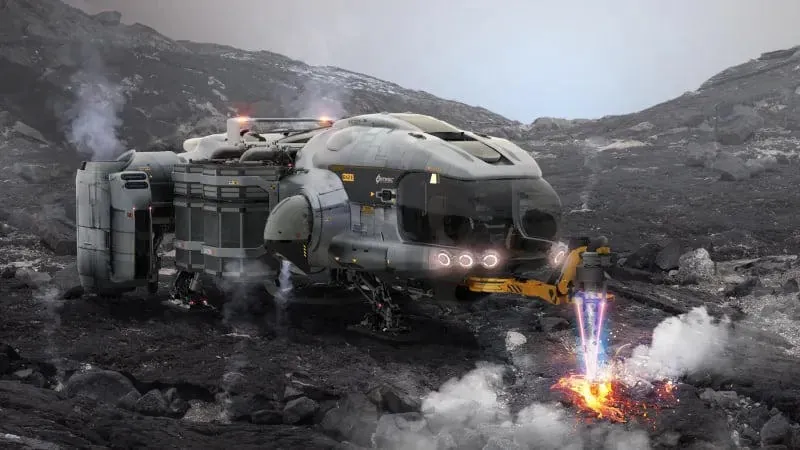
- Per PAF: blue maintenance cards from warehouses, red security cards from on-site printers, three Alignment Blades behind the red doors, seat blades in the console, take the orange GP-XP battery when the garage opens.
- Repeat at all three PAFs. Juvenile Valakkar can join the party after alignment. Nine Tails recycle out of the blue double doors.
- OLP pads: seat three batteries. Grab the activation card from the orbital control room.
- Unmarked bunker about 1 km under the OLP. Card in, fire. Cave opens. Target loot is Carinite / Carinite (Pure), not a ship-size rock.
Wikelo, Recco, Pirate Week, retired tracks
Wikelo Emporium
Banu trader. Three Stanton emporiums. Accept collection contracts in person at the bazaar, dump the freight elevator, collect ships / armor / components in local inventory. Storm Breaker pearls and fangs, Onyx drives, siege pieces, and a rotating 4.10 ship all feed him. He is a sink, not an instance.
Recco Battaglia - Levski
In-person giver as of 4.10, instanced workshop off Levski’s borehole levels. Zero CrimeStat. Story: Welcome to the System → Emergency: Blinding Hope in Trouble (Associate / about 2,400) → Idea for Isaac (Trusted / about 6,000). Prestige jobs mail Alliance-livery miners home: Golem, Prospector, MOLE. Her office is the second Instancing-on-Demand space after Siege.
Pirate Week 2026
9-28 Sep 2026. Outlaw theme on top of the 4.10 build. Levski Memorial cipher in Delamar tunnels, later segments into an Underworld Intercept Terminal master code. Completion flair reported: Nine Tails Golden Challenge Coin + Dread Outlaw Spectrum title. Most Wanted contest dies 28 Sep 20:00 UTC. This is a scavenger hunt, not a combat instance.
Return of Xenothreat - retired
4.8.3, 2-15 Jul 2026. Point-track mercenary contracts (defend alien-made ships, fighter waves, Hammerhead ambush, lieutenants, Idris-M). Purgatory-camo armor and NDB repeater blueprints. Not on LIVE as an active bar.
Jumptown
The dynamic lawful vs unlawful drug war event is discontinued. The Daymar / Yela labs are still on the map and still attract campers. Treat them as a PvP POI, not a scheduled event.
Calendar noise
Foundation Festival free-fly (late Jul-10 Aug 2026) is closed. Ship Showdown 2956 is an RSI website bracket. Bar Citizen is a real-world pub crawl. DefenseCon, Alien Week, Day of the Vara, Coramor, CitizenCon are annual marketing / lore holidays - they add paints and storefronts, not dungeons.
Star Citizen Beginner Guide (Alpha 4.7+)
Here's a complete beginner-friendly guide to Star Citizen (Alpha 4.7+ as of 2026). The game is a massive, immersive space sim MMO still in development - expect bugs, wipes, and a steep learning curve, but it is incredibly rewarding.
1. Getting Started
- Create an account on robertsspaceindustries.com and use a referral code for bonus starting aUEC.
- Buy a game package - this is required to play permanently.
- Recommended starter ships: RSI Aurora Mk II or similar entry-level package.
- Download the Star Citizen Launcher (~100GB+ install).
- Tip: Try Free Fly events before purchasing.
2. First Time In-Game
- Complete the tutorial (movement, oxygen, ship basics).
- Set spawn location at hubs like Everus Harbor or New Babbage.
- Open MobiGlas (F1) for contracts, inventory, and map.
- Always manage helmet, oxygen, and survival needs.
3. Controls & Flying Basics
- Use mouse + keyboard or HOTAS for flight.
- Space = thrust up / accelerate.
- C = cruise / decouple mode.
- Quantum Travel: Align, spool (B key), then jump.
- Practice in Arena Commander for safe training.
4. Earning Your First aUEC
- Delivery and investigation missions (easiest start).
- Basic mining or cargo hauling.
- Bounty hunting when comfortable with combat.
- Avoid high-risk systems until experienced.
5. Core Activities (Career Paths)
- Mining: Hand mining or ships like Prospector / MOLE.
- Hauling: Trade and cargo transport.
- Combat: PvE bounty hunting and missions.
- Salvage / Exploration: Resource gathering and wreck recovery.
- Rock Cracker: Advanced Nyx activity involving powering stations, firing a laser, and mining cracked asteroids for rare ores.
- Crafting / Medical: System management and item creation (4.7+ features).
6. Survival & Tips
- Inventory management is important in 4.7+.
- Always carry medpens, ammo, and armor.
- Set safe spawn points.
- Expect bugs and report issues via Issue Council.
- Use Spectrum, Discord, or Guide System for help.
7. Progression & Mindset
- Progress is persistent but wipes can occur in alpha.
- Ships can be earned in-game over time.
- Play at your own pace - solo or group gameplay both work.
- Watch beginner guides for visual learning.
Star Citizen is about immersion and exploration in a living universe. The first hours can feel overwhelming, but it quickly clicks with experience.
Fly safe, citizen.
Star Citizen Salvaging: The Scrapper's Guide to Profit
Salvaging is the process of breaking down derelict ships and structural components into Recycled Material Composite (RMC) for sale. This guide details the two main salvaging methods: Hull Scraping and Component Salvage.
1. Preparation: Equipment and Location
Before you head out into the void, you need the right ship and location.
- The Ship: You need a vessel equipped with salvaging modules. The Drake Vulture (solo) and the Aegis Reclaimer (multi-crew) are the dedicated salvaging ships.
- Location (The Wreck): Look for derelict ships or debris fields. These can be found via:
- Salvage Missions: Available on your mobiGlas (F1) in the Contracts Manager. These guide you to legal wrecks.
- Player-Created Wrecks: Look for markers in high-traffic or recent battle areas. Be cautious, as these are often unregulated and may attract pirates.
2. Hull Scraping (RMC Generation)
Hull Scraping is the most common method, used to harvest the hull plating into RMC.
- Activate Salvage Mode: Press the M key to activate Salvage Mode. Your HUD will switch to the salvaging interface.
- Toggle to Hull Scraping: Ensure your salvage tool is set to Scraping mode (typically via the G key).
- Position and Power: Fly close to the target hull and aim the twin laser beams at the plating.
- Monitor the Gauge: The central HUD displays a density/resource gauge.
- Optimal Zone (Green): Maintain the density meter in the green zone for efficient RMC collection.
- Adjust Power: Use the mouse wheel to adjust laser power and keep the density stable.
- Harvesting: As you scrape, plating converts into RMC and is stored in your ship's internal buffer. The hull section darkens when fully stripped.
- Transfer to Cargo: Once the buffer fills, transfer the RMC to cargo containers (SCUs). This is automated in the Vulture, and requires terminal interaction in the Reclaimer.
3. Component Salvage (High-Value Parts)
Component Salvage ("munching") retrieves high-value ship components such as quantum drives, coolers, and power plants. This is typically done using the Aegis Reclaimer's internal grinders.
- Preparation: Access to interior component racks may require cutting through wreck sections (using a multi-tool or the Reclaimer's cutting arm).
- Locate Components: Enter the wreck and find the component you want to salvage.
- Removal Tool: Use the appropriate tool (usually the Salvage Multi-Tool Attachment) to detach the component.
- Storage: The component becomes a physical object (small SCU box or item) and must be manually carried and loaded into your ship's cargo hold. These items sell for significantly more than RMC.
4. Selling the Loot
After collecting RMC or components, you must sell them for profit.
- Land: Touch down at a space station or city landing zone with a trade terminal.
- Access a Trade Terminal: Use the Commodity Kiosks.
- Selling RMC: RMC stored internally or in cargo boxes can be sold directly at most terminals.
- Selling Components: High-value components often fetch the best prices at Scrap or Commodity kiosks, depending on the station's economy.
Tip: Be cautious in high-traffic salvage zones - a full cargo hold can attract pirates or opportunistic players!
Star Citizen Mining: A Beginner's Guide to Profit
Mining is a highly profitable, skill-based profession in the 'Verse, blending technical precision with high-risk cargo runs. This guide breaks down the essential steps to get you from identifying a rock to selling refined materials.
1. Preparation: Getting Your Kit Ready
Before you launch, ensure you have the right equipment.
- The Ship: You need a dedicated mining vessel. The MISC Prospector (solo) and the Argo MOLE (multi-crew) are the primary ships. These come equipped with the specialized mining laser turret.
- Components (Optional, but Recommended): To tackle tougher, more valuable rocks, you'll need upgrades. Focus on Mining Heads (like the Helix for power or Brandt for stability) and Consumables (like Surge for instant energy bursts, or Stampede to lower resistance).
- Location: Decide where you want to mine. Asteroid belts (like the Yela Belt) offer floating rocks, while planets and moons (like Daymar or Aberdeen) offer large ground deposits.
2. Locating and Analyzing the Deposit
Finding the right rock is half the battle. You want high-value materials (like Quantanium or Bexalite) with low resistance and instability.
- Activate Mining Mode: Press the M key on your keyboard to switch your ship systems into Mining Mode. This replaces your standard weapons HUD with the mining interface.
- Scanning: While in Mining Mode, your Scanner is active. Point your ship's nose toward potential deposits (white diamonds on your HUD). The scanner will display the rock's Mass, Distance, and Material Composition.
- Detailed Analysis: Once you've selected a rock, scan it to get its full profile. Pay attention to:
- Optimal Charge Zone: The sweet spot where you must maintain energy.
- Instability: How violently the rock reacts to energy input (higher = harder to control).
- Resistance: How much power is needed to crack the rock (higher = longer/harder fracture time).
3. The Fracturing Process (Breaking the Rock)
This is the most challenging part of the loop, requiring precise control of your laser power.
- Target and Charge: Position your ship close to the rock and start channeling power by holding the Left Mouse Button (LMB).
- Monitor the Gauge: Watch the Rock Energy Level gauge.
- Goal: Keep the indicator in the green Optimal Charging Zone.
- Too Low (White Zone): Nothing is happening - increase power.
- Optimal (Green Zone): Fracture meter increasing steadily - maintain!
- Too High (Red/Yellow Zone): Overheating! Staying in red too long causes a violent explosion, destroying the rock - and potentially you. Reduce power immediately.
- Adjust Power: Use the Mouse Wheel to fine-tune laser output and keep the indicator within the green zone. Instability and Resistance will influence how constantly you need to adjust.
- Fracture: When the Fracture Sensor reaches 100%, the rock will split into harvestable fragments.
4. Collection, Refining, and Profit
Once fractured, your work isn't done - you still need to convert raw material into sellable credits.
- Switch to Collection Mode: After fracturing, press M again to toggle your laser to Collection Mode.
- Siphon Fragments: Target the pieces and hold LMB to siphon raw ore into your ship's internal storage tanks.
- Refining: When full, fly to a station with a Refinery Deck (e.g. GrimHEX). Begin a Refining Order - raw ore cannot be sold directly. Refining takes real time but massively increases profit.
- Selling: Once refined, retrieve the finished cargo and sell it at any major trade station or landing zone for maximum returns.
Tip: If you strike Quantanium, be quick - it's extremely unstable and can explode if left in your ship for too long!
Star Citizen Hauling: The Complete Trading Guide
Hauling, or cargo trading, is the process of buying commodities low at one location and selling them high at another for profit. While this loop can be highly lucrative, it carries a high risk of loss due to piracy or technical issues.
1. Preparation: Ship, Funds, and Information
Success in hauling requires capital and careful planning before leaving the hangar.
- The Ship: You need a dedicated cargo vessel, typically measured by its SCU (Standard Cargo Unit) capacity. Popular haulers include the Freelancer MAX, Caterpillar, and Hercules C2 Starlifter. Ensure your ship has high shields and a fast Quantum Drive.
- Starting Capital: Trading requires significant upfront investment to buy the goods. Start with low-value commodities until you build enough capital for high-profit cargo.
- Find Your Route: Determine where to buy low and sell high.
- External Tools: Many players use third-party tools to track real-time commodity prices because the in-game market is dynamic.
- In-Game Scouting: Fly between trade terminals (cities, rest stops, mining outposts) and manually check prices for high-demand goods.
2. Securing and Loading the Cargo
Once you have capital and a route, the actual trade transaction takes place at the terminal.
- Land and Access Terminal: Land at the appropriate trade location (such as a mining outpost or a city's Cargo Deck). Access a Commodity Kiosk (Trade Terminal).
- Verify Inventory: Select the location where your ship is stored (e.g., "Lorville - Teasa Spaceport").
- The Purchase: Note on Bulk Hauling: Many profitable routes involve volatile goods (like Quantanium) or high-risk materials. Always consider the balance between risk and profit.
- Select the commodity you want to buy (e.g., Laranite, Agricultural Supplies).
- Choose how many SCUs of the commodity you want - the terminal shows cost and remaining ship capacity.
- Confirm the purchase. Cargo is automatically loaded into your ship's cargo grid.
3. The Transport: Navigating and Risk Management
The longest and most dangerous part of the hauling loop is the transport phase.
- Plot the Route: Set your Quantum route via your HUD (B key) or the Starmap (F2).
- Quantum Travel: Engage Quantum Drive. Shorter routes are safer, but long-distance hauling often yields higher profits.
- Piracy Risk: High-value cargo routes are common pirate hotspots.
- Mitigation: Use radar, fly with escorts or groups, run decoy shipments, or use faster ships if possible.
- Emergency Stops: If pirates interdict you or your ship malfunctions, remember that cargo is physicalized - losing the ship means losing everything aboard.
4. Selling the Commodity
Completing the sale is the final step to securing your profit.
- Arrive and Land: Fly to the destination station or city offering the highest sale price.
- Access Terminal: Use a Commodity Kiosk at the landing zone.
- The Sale:
- Select your ship's storage location.
- Open the Sell tab - it displays your cargo grid contents.
- Review the current market prices and total profit margin.
- Confirm the sale - credits are instantly transferred to your wallet.
5. Profit Calculation
Your profit is simply the Sale Price minus the Purchase Price. Reinvest your profits into larger cargo runs to rapidly scale your hauling business.
Star Citizen Bounty Hunting: The Hunter's Guide
Bounty Hunting is a profitable combat profession involving tracking down and neutralizing targets - either NPC criminals or, in higher-tier missions, player criminals (PlaBeys).
1. Preparation: Loadout and Location
Success depends on speed, durability, and firepower.
- The Ship: A combat-optimized ship is essential. Fast, maneuverable fighters like the Arrow, Gladius, or the heavier Vanguard series excel. Ensure your weapons are correctly sized and your power components support sustained combat.
- The Gear (FPS Bounties): For ground-based bounties (bunkers or outposts), bring full FPS gear: heavy armor, a reliable rifle (P4-SC, AFS-MG), medpens, and a multi-tool.
- Reputation: High-paying bounty missions unlock as you gain Rep with the Bounty Hunter's Guild (BHG). Begin with lower-tier missions like MRT/LRT, then progress to VHRTs and ERTs.
2. Accepting the Contract
Bounty missions are tracked and managed through your mobiGlas.
- Access Contracts: Open your mobiGlas (F1) and navigate to the Contracts Manager.
- Select Bounty Hunting: Choose the Bounty Hunter Guild missions under the legal contracts section.
- Choose Tier: Select a mission based on your Rep. Common tiers include:
- ERT (Extreme Risk Target): Highest difficulty - often capital ships or elite players.
- VHRT (Very High Risk Target): Advanced ship combat requiring skill and strong loadout.
- HRT, MRT, LRT: Lower tiers ideal for learning and early progression.
- Accept Mission: After accepting, the target's location will appear on your HUD and Starmap.
3. Tracking and Engagement (Space Bounties)
Space bounties require you to travel to and eliminate targets in ship-to-ship combat.
- Quantum Travel: Set your Quantum Drive destination to the bounty marker and jump. Targets often appear near moons, planets, or nav points.
- Initial Scan: On arrival, use your ship's scanner (Tab key) to confirm the target's identity and determine if they have escort ships.
- The Fight:
- Positioning: Use strafing, speed, and afterburners to flank enemies and stay in their blind spots.
- Power Management: Adjust your power triangle (F5/F6/F7) to prioritize shields or weapons depending on the situation.
- Elimination: Destroy the target's ship. A confirmation notification and reward appear immediately once the bounty is neutralized.
4. Ground Bounties (Bunker/Outpost Clearances)
Ground bounties require landing, breaching a bunker or outpost, and clearing hostile NPCs in an FPS combat environment.
- Insertion: Quantum to the mission marker and land a safe distance away to avoid turret fire.
- Ground Assault:
- Clear External Threats: You may need to disable comm arrays or avoid turrets before approaching.
- Entry: Proceed inside carefully - bunkers have narrow corridors and hostile NPCs with unpredictable behavior.
- Objective: Eliminate all hostiles or the specific named target indicated by your HUD.
- Exfiltration: Once the mission is complete, return to your ship to receive your reward.
5. Collecting the Reward
Rewards are automatically deposited into your mobiGlas wallet upon mission completion. High-tier missions may include cool-downs or confirmation steps but offer significantly higher payouts.
Bounty hunting is one of the fastest ways to earn UEC - but also one of the riskiest. The toughest missions often require engaging skilled player pirates or heavily armed NPC escorts.